


As with knitting itself, no one really knows the origins of buff mittens (modeled by a Santa Clara logger above, front right). Today, antique examples are found in the Adirondacks, New England and Canada, wherever there were loggers, winter and work in the woods. Coming from different places and never mass produced, the homemade hand-warmers have been known by names such as shag or shagged mittens, fringe, buff or latch-hook mittens—all references to the yarn that forms a thick pile on the surface of the knit fabric.
Because of the way they were made—and made with wool—buff mittens were warm, windproof and practically waterproof. This is due to the “sticky” nature of wool fibers, which bind together and “felt” when rubbed, especially in the presence of moisture. After a few wearings, buff mittens tended to felt-up slightly on the inside, making the fabric tight.
I learned buff knitting from the late Katie Baker Cross, of Johnsburg. Born in 1916, she grew up on a farm in Thurman where her father raised sheep and her mother spun wool and made buff mittens, selling them in Warrensburg and filling orders from men in lumber camps. Cross explained the process simply: you knit the regular way and use a different color yarn to make loops between the stitches.
HOW TO MAKE KATIE CROSS'S BUFF MITTENS
Begin by making a conventional mitten cuff on four double-pointed needles. Don't increase between the cuff and the hand, as the loops tend to stretch the fabric width-wise, making the buff-mitten hand naturally larger than in plain knitting.
After the cuff, bring in a contrasting color of yarn as follows: Lay the loose end of the secondary yarn on the cuff. Knit your first stitch "over" this tail so that it is captured in the space between. Then, between each subsequent stitch, loop a short length of secondary yarn from the back to the front of your work and capture it by knitting over it. Work according to the illustrations and caption details below.
With practice, a rhythm will develop: make a loop from back to front; lay the loop down and hold; make a stitch, left needle to right; repeat all over again.
Increase and set aside stitches for the thumb as you usually would. Then, on a day when you have lots of patience, pick those stitches from their holder to make the thumb. This step is by far the hardest, as you struggle to pick up stitches from amidst a mass of loops that won't stay out of the way.

1. Knitting with four double-pointed needles, hold the background or mitten yarn at normal tension. The secondary or shag yarn lies loose at the inside of the work.
2. Prior to making a stitch, draw the secondary yarn from back to front in the space between the last and next stitch, using your middle finger to make a loop.
3. With that middle finger, lay the loop down on the front of your work and hold it in place with your left thumb. With the loop out of the way, go into the next stitch and knit it normally.
4. The background or mitten yarn has just captured a loop, and you're ready to loop and stitch again.
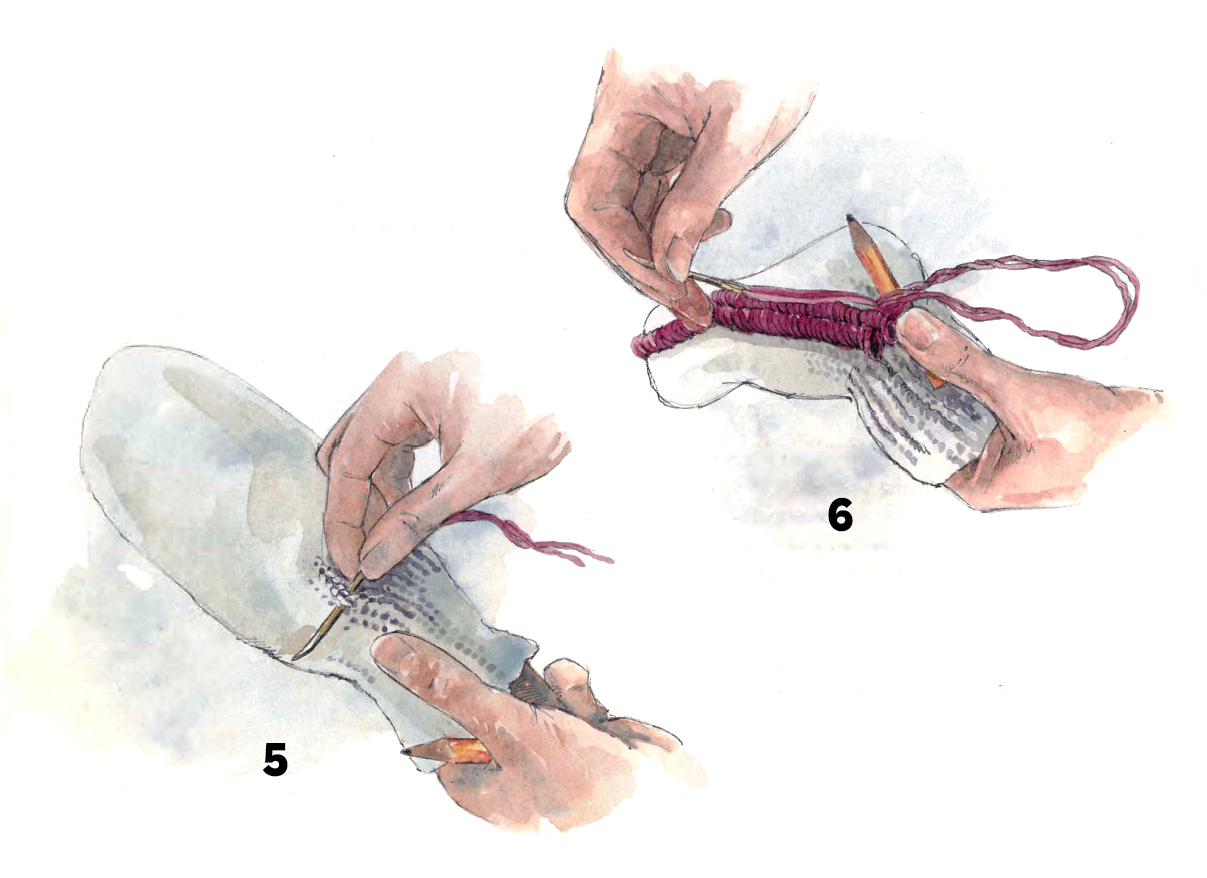
5. Insert the needle into the middle of one stitch so that it comes out the middle of the adjacent stitch. For the first loop, you'll draw the yarn through, leaving an inch or so of loose tail. Then go to the next higher stitch and repeat the motion, inserting the needle into the middle of one stitch, out the middle of the neighbor.
6. Don't draw the second stitch tight: lay a short piece of dowel or fat pencil into the loop lined up vertically with the row you're working on. Press the mitten fabric away from the pencil so you can see where to make subsequent stitches.
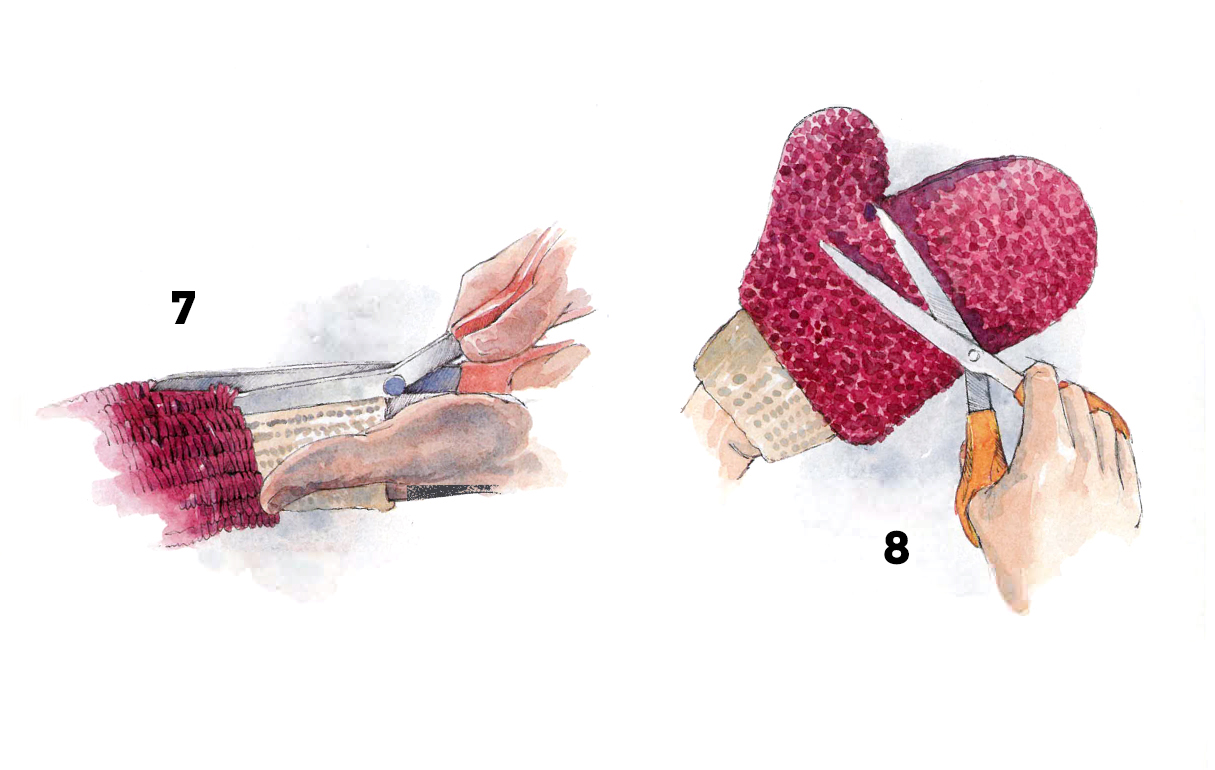
7. Cutting all the loops at the end is a great reward. This makes your mittens truly buff.
8. A little "haircut" evens things up. You can "felt" the mitten with hot water now.
Adapted from "Handcrafted Traditions: Buff Mittens" (February 2001)












You must be logged in to post a comment.